This instance demonstrates the way to configure a grid structure supervisor to specify app resize habits. The app accommodates a drop-down, a listing field, and a table with some knowledge. Create a UI determine window with a 3-by-2 grid format. Then, create the UI elements and add them to the grid structure by specifying the Layout.Row and Layout.Columnproperties. Slide Guidelines are guidelines which are unique per slide. That is, you can set up as many Slide Guidelines on a given slide as you want to, and each slide can have its personal set of Slide Guidelines. Horizontal Guidelines may be created by clicking and dragging from the Ruler on the highest of the Canvas. To remove a Guideline, click and drag it up or to the left and launch the mouse when the X icon seems. You can even right click on on the Guideline and choose the choice for Delete Guideline. Change the colour of your Slide Guidelines by clicking the Guidelines button and clicking the color chooser subsequent to Slide Guidelines. By now, you have a fairly good idea of tips on how to create a window with Tkinter, add some widgets, and control the applying structure. That's nice, but functions shouldn't just look good—they actually have to do something!

In this part, you'll learn to convey your applications to life by performing actions each time sure occasions happen. The three widgets will be organized so that the 2 buttons are on the left-hand facet of the window, and the textual content box is on the right-hand side. The entire window should have a minimum top of 800 pixels, and txt_edit ought to have a minimal width of 800 pixels. The complete layout must be responsive so that if the window is resized, then txt_edit is resized as nicely. The width of the frame holding the buttons mustn't change, however. Guarded blocks are protected areas that are not editable in Source view. You can only edit code appearing in the white areas of the Editor when in Source view. When you save your changes, the IDE updates the file's sources. In this lesson, you built a multipage net app that options two maps about languages in India. You created filtered map views of individual languages utilizing bookmarks, and you created a guided tour of some interesting components of the info utilizing a listing. You added buttons, credit score textual content, and a customized legend.
Finally, you altered the layout to ensure that it'll work on screens of various sizes. After inserting a layout, you probably can easily swap between the choices. This replaces the add, take away, and move section performance of the legacy editor. These two strains of code create a grid with one row and two columns for window. You place frm_buttons within the first column and txt_edit in the second column so that frm_buttons seems to the left of txt_edit within the window structure. In this section, you discovered how to create a window, use widgets, and work with frames. At this point, you can make some plain home windows that show messages, but you've but to create a full-blown application. In the following section, you'll learn to management the structure of your purposes utilizing Tkinter's powerful geometry managers. Rather than resizing rows and columns individually, you'll have the ability to modify the height and width of each row and column in a spreadsheet at the same time utilizing the Select All button. This technique lets you set a uniform measurement for the spreadsheet's rows and columns. The JButton elements appear in the form and their corresponding nodes are displayed in the Navigator window. The JButton parts' code can also be added to the form's supply file which is visible within the Editor's Source view. Each of the JButtons are set to the same size as the button with the longest name. In this step, we'll add the two required buttons after which edit them so that they seem the same dimension in our type even though their show textual content are different lengths.
It does this by extending the current NetBeans IDE GUI Builder to support a simple "Free Design" paradigm with easy format guidelines which would possibly be easy to grasp and use. As you lay out your kind, the GUI Builder offers visual guidelines suggesting optimum spacing and alignment of elements. In the background, the GUI Builder translates your design selections into a useful UI that is implemented utilizing the model new GroupLayout structure manager and other Swing constructs. Whenever you resize the shape, change locales, or specify a special look and feel, your GUI automatically adjusts to respect the target look and feel's insets and offsets. Apps created utilizing the uifigure operate are resizable by default. The parts reposition and resize mechanically because the app person adjustments the size of the window at run-time. To change information about an individual slide that you've chosen, go to the Slide Tab in the Inspector.Click the checkbox next to Enabled to enable or disable the slide. Change the Hot Key for the slide by clicking within the textbox and typing a letter. The Label section allows you to change the Label for the slide. Toggle a Background colour for the slide by clicking the checkbox subsequent to Background. Click the color field to pick a pre-defined shade, or click the color wheel to select any color. You can even add, change, or take away a slide's Chord Chart. The Chord Chart function lets you add a PDF into the slide that can set off to a Stage Screen should you've added a linked item to a Chord Chart in your structure. We used media queries to outline a model new structure when the viewport is 30 rem broad or larger. We defined the value in rems as an alternative of pixels to enhance the accessibility of the web page for users rising the font size. For most customers with devices lower than 500 px extensive, which is roughly 30 rem when a rem is the default sixteen px, the narrow structure will seem.

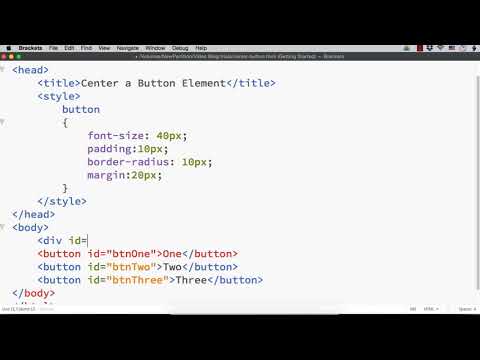
However, if users have increased their font measurement, they may get the slim format on their pill or even desktop monitor. Sometimes it's onerous to select a specific component in a crowded storyboard's view controller. You can select the component from the outline view, or use Shift and right-click or Control-Shift-click on the view you wish to choose. This gives you a context menu that shows the view hierarchy at the location you clicked. Select the stack view by clicking on it within the menu. These labels and buttons have background colors that won't present at runtime. In the storyboard, they're visual aids to assist present how altering numerous properties of a stack view affects the frames of its embedded views. In order to get both buttons into the same column, you'll have to create a Frame widget called frm_buttons. According to the sketch, the 2 buttons must be stacked vertically within this body, with btn_open on prime. You can do this with both the .grid() or .pack() geometry manager. For now, you'll stick to .grid() since it's somewhat easier to work with. Whenever you could have too much cell content to be displayed in a single cell, you might decide to wrap the text or merge the cell rather than resize a column. Wrapping the text will mechanically modify a cell's row top, permitting the cell contents to be displayed on a quantity of lines. Merging allows you to combine a cell with adjacent empty cells to create one large cell. Until now we've focused on including components to our ContactEditor GUI using the IDE's alignment tips to assist us with positioning. It is important to grasp, nevertheless, that another integral a part of part placement is anchoring. Though we haven't discussed it but, you've already taken advantage of this feature with out realizing it. As mentioned beforehand, everytime you add a part to a kind, the IDE suggests the goal look and feel's most popular positioning with tips. Once positioned, new components are additionally anchored to the closest container edge or part to guarantee that component relationships are maintained at runtime.

In this part, we'll concentrate on accomplishing the duties in a extra streamlined style whereas mentioning the work the GUI builder is doing behind the scenes. Now we'll add the combo field that can enable customers to pick out the format of the knowledge that our ContactEditor application will display. As we add the JComboBox, we'll align its baseline to that of the JLabel's textual content. Notice once once more the baseline alignment pointers that appear to help us with the positioning. Every time you add a part to a kind, the GUI Builder successfully aligns them, as evidenced by the alignment guidelines that seem. It is usually necessary, however, to specify different relationships between groups of elements as well. Earlier we added four JLabels that we'd like for our ContactEditor GUI, but we didn't align them. Now we'll align the two columns of JLabels in order that their proper edges line up. When the vertical alignment pointers appear suggesting the margin between the text area and JPanel edges, release the mouse button to resize the JTextField. When the vertical alignment tips appear suggesting the margin between the text field and proper edge of the JPanel, release the mouse button to resize the JTextField. Move the cursor to the higher left corner of the form within the GUI Builder. When the component is positioned close to the container's prime and left edges, horizontal and vertical alignment tips seem indicating the popular margins. Click in the form to position the JPanel on this location. For instance, this code creates a grid layout manager with 4 rows. The height of the primary row is sized to fit its content material, the second row is fixed at 200 pixels, and the final two rows share the remaining vertical space unequally. The third row makes use of twice as much area as the fourth row.

Responsive– The desk will increase as you add content, and you can drag to resize the columns. It'll additionally resize itself to suit the page-viewer's window size . You can sort your text into the textbox in the heart of the Slide Notes space. This textbox helps wealthy textual content formatting, which means selected textual content could be daring, italicizes, totally different fonts, sizes, and even colours. Use the Inspector on the proper of the Editor to make adjustments to the formatting of the text. Click on the gear icon for more options, such as paragraph settings and margins. The Editor features a set of Rulers that may present on the highest and left edges of the display screen to better help you see the positioning of the objects within the Editor. You can allow and disable the Rulers by clicking on the Rulers button in the decrease right of the Editor or by selecting the Editor menu and choosing Show Rulers. Click on the Color option to select which shade you want to use in your Grid. You can regulate the spacing of the Grid by setting the Spacing and Subdivisions . Click outside of the Grid window to close the window. On a narrow display screen, we will show all the sections in one column. On wide screens, we lay these three sections subsequent to one another in textual content course. Using flex, by default, those three sections are the same peak. These two lines of code create a grid with two rows and one column in the frm_buttons body since each btn_open and btn_save have their grasp attribute set to frm_buttons.

Btn_open is put within the first row and btn_save within the second row in order that btn_open seems above btn_save in the layout, just you deliberate in your sketch. Remember, row and column indices are zero-based, so these settings apply solely to the second column. It is usually helpful to set several associated components, similar to buttons in modal dialogues, to be the same measurement for visual consistency. Afterwards, we'll set the four buttons to be the same size to enable them to be easily acknowledged as providing related performance. Since JLists are used to display lengthy lists of information, they sometimes require the addition of a JScrollPane. Whenever you add a component which requires a JScrollPane, the GUI Builder mechanically adds it for you. Because JScrollPanes are non-visual elements, you have to use the Inspector window to be able to view or edit any JScrollPanes that the GUI Builder created. In order to do this we want to deselect the JPanel we just added. Because we haven't added a title border yet, the panel disappears. Notice, nevertheless, that if you cross the cursor over the JPanel, its edges change to mild gray in order that its position could be clearly seen. You need solely to click on anyplace within the part to reselect it and cause the resize handles and anchoring indicators to reappear. When a person scrolls and images are lazy-loaded, these img components go from a peak of zero pixels to no matter they need to be. This causes reflow, the place the content material under or across the picture gets pushed to make room for the freshly loaded picture. Reflow is an issue because it's a user-blocking operation. It slows down the browser by forcing it to recalculate the format of any elements which are affected by that image's shape. The CSS scroll-behavior property could assist here at some point, but its support needs to enhance before it's a viable possibility. As a stage is resized, layout panes within the stage might need roughly space to allocate to the controls that they include. For instance, a ListView object has an unbounded maximum. If you wish to limit the height to its most popular dimension, you'll be able to set the utmost size to the Control.USE_PREF_SIZE fixed, as shown in Example 2-3. Some changes have an effect on only the chosen appearances, whereas different changes have an result on all energetic appearances.
If you select an appearance and apply a special background shade or edit the text, the change affects solely the selected appearance. If you utilize the Selection software to move or resize the button, the change impacts all appearances. You can even assign a quantity of actions to the same occasion. For example, you can create an motion that plays a film and sets the view zoom to Actual Size. If the sheet appears opaque, change the background color to None for the underlying dashboard, object, or structure container. You can shortly regulate this stuff on the Layout tab for the dashboard. If you add multiple sheets with related knowledge to a structure container, whenever marks are chosen in one sheet, you can automatically resize related sheets. A horizontal structure container resizes the width of the views and objects it incorporates; a vertical format container adjusts peak. Use this setting whenever you're designing for two different display sizes that need the same content material and have related shapes—such as small- and medium-sized browser windows. The former method of resizing a display, grabbing corners with the mouse and shifting them, does nothing for me, besides occasionally and at random it expands the window to full display screen. I have found you could transfer the app window if you position the mouse over the edge to get the horizontal or vertical resize arrows. The trick is to move the mouse horizontally when you have the vertical resize arrows or vertically in case you have the horizontal resize arrows. It is a bit tricky, however it works on Mavericks 10.9.x This trick doesn't work with the diagonal resize arrows.

The trick works higher should you get the resize arrows the furthest away from the window with out turning back into a standard pointer. You can follow this trick on any window, off display screen or not. Once you have created your new Arrangement you will need to drag the Groups into the order that you just want to be shown in that new Arrangement. For instance, in case you have Chorus in your Arrangement five instances and add a background to the primary slide of the Chorus, will probably be added to the other situations of Chorus. This also applies to any modifications made to the text on a slide. These modifications are also reflected in other Arrangements that use the same Group. The properties of an Arrangement usually are not unique to that specific Arrangement. The Build Tab within the Inspector permits you to set an individual transition for the Slide you've chosen. There are much more choices on this tab used upon getting an Object chosen. Here, you'd simply have the options of no matter transition you select for the slide to seem on your screens. You have to guarantee you zero out the cross-dimension, box-model properties whereas maintaining the properties contributing to the main-size. In this case, we preserve the left and right border widths and padding whereas zeroing out the top and bottom border widths and padding. The magic grid is shown in Figures 4-11, 4-12, and 4-13. One of the more difficult layouts to create with flexbox is a responsive grid of items, which was exhibiting inFigure 1-2. In reality, this is why the grid structure module has been a work in progress. Grid supplies for creating a flexible design grid for an element in order that the descendants of the element may be positioned relative to that grid.


